Have you ever wondered how pencils are made? The pencil is a writing instrument that has been widely used for centuries. In modern times, there are several types of pencils, including automatic pencils that have replaceable refills and do not require sharpening. Despite the digital age, pencils remain a popular and versatile tool for writing, drawing, sketching, and note-taking due to their simplicity and ease of use.
We recently visited a supplier in Qingyuan County, East China. The pencil industry in Qingyuan County, Lishui City, Zhejiang Province, was born at the beginning of China’s reform and opening up in the late 1970s and continues to write new chapters. The latest statistics show that in 2020 there were 47 pencil companies, producing more than 7 billion pencils and realizing a total output value of 2 billion yuan ($307.75 million).
Our visit was also to visualize the whole process and show our customers a quick guide to pencil manufacturing in China.
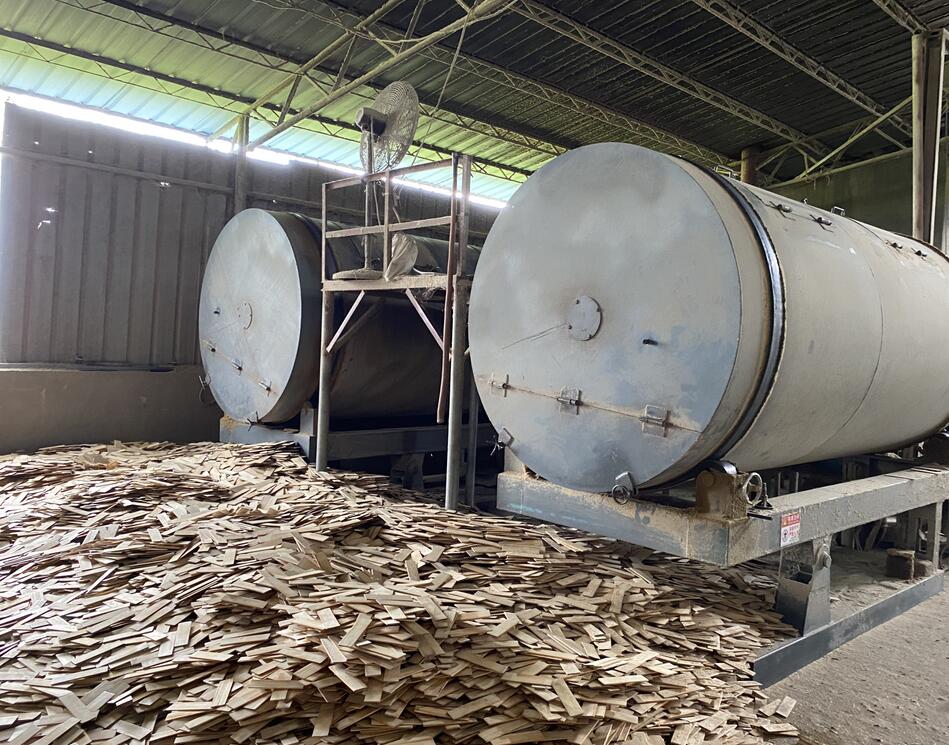
Step1. Wood Preparation
Pencil Factory purchases pre-cut wood chips from wood chip mills and dries them to make them more stable before processing. The humid climate in the eastern part of the country makes wood susceptible to moisture. Drying is very important to ensure that the pencils do not get moldy.
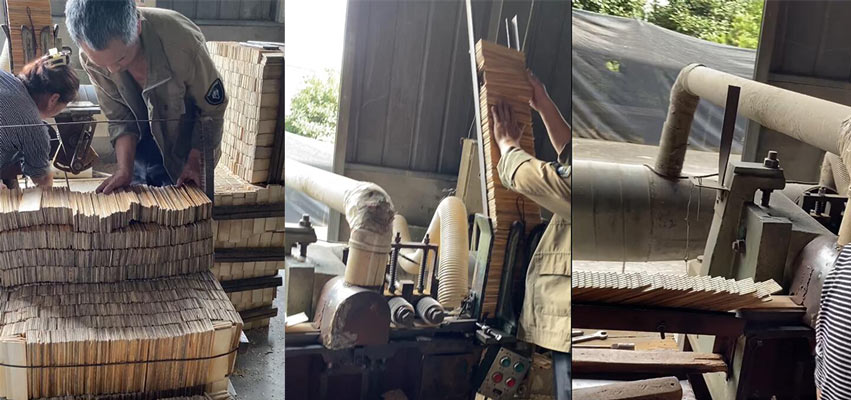
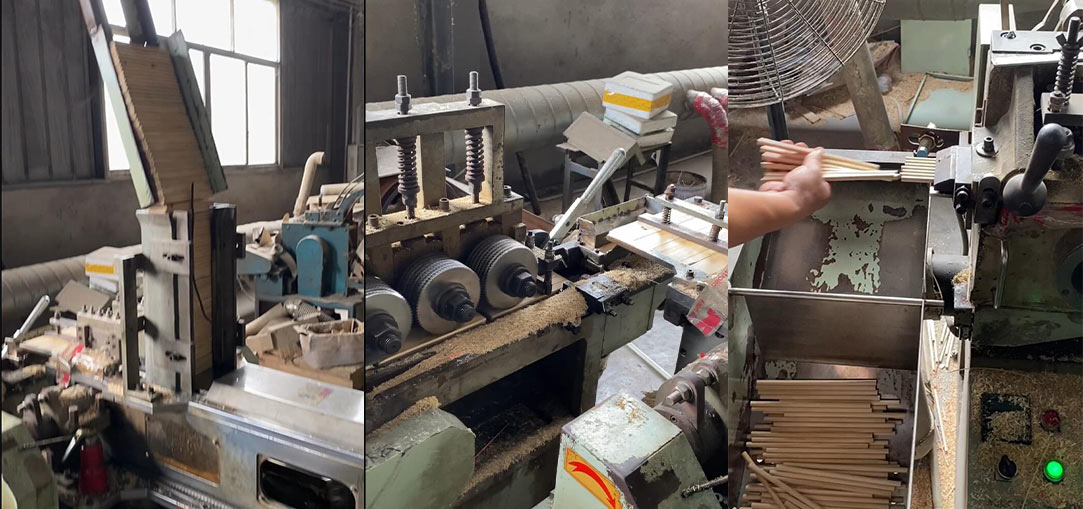
Step2. Engrave the Planks
These strips are the laths. The slats are placed on a machine that runs them through a cutter that leaves parallel semicircular grooves along the length of one side of each slat to a depth of half the thickness of the graphite.
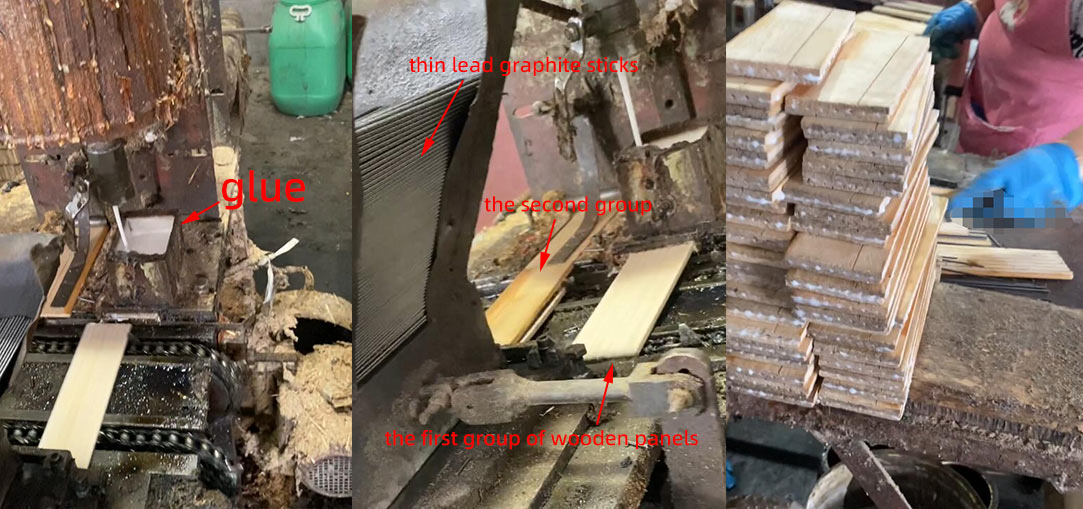
Step 3. Add glue and stack wood and lead
The unique formula of this special glue contains polyvinyl acetate, which gives it elastic properties. This ingredient creates a strong bond and ensures long-lasting adhesion.
The glue firmly bonds the sides of the pencil together very effectively, giving the illusion that the pencil was originally made from a whole piece! Finally, the graphite lead was inserted into the first set of planks, with the second set placed directly on top. This resulted in two large planks stacked on top of each other with the graphite lead sandwiched in between.
The base of the pencil is assembled from three separate pieces. The first plank is guided through the flat surface of the assembly line, the graphite lead is precisely aligned into the carved groove, and finally, the second plank is placed on top.
At this stage of production, stacked panels encase thin graphite lead rods within the grooves. These grooves are lined with elastic adhesive to hold the graphite leads firmly in place.
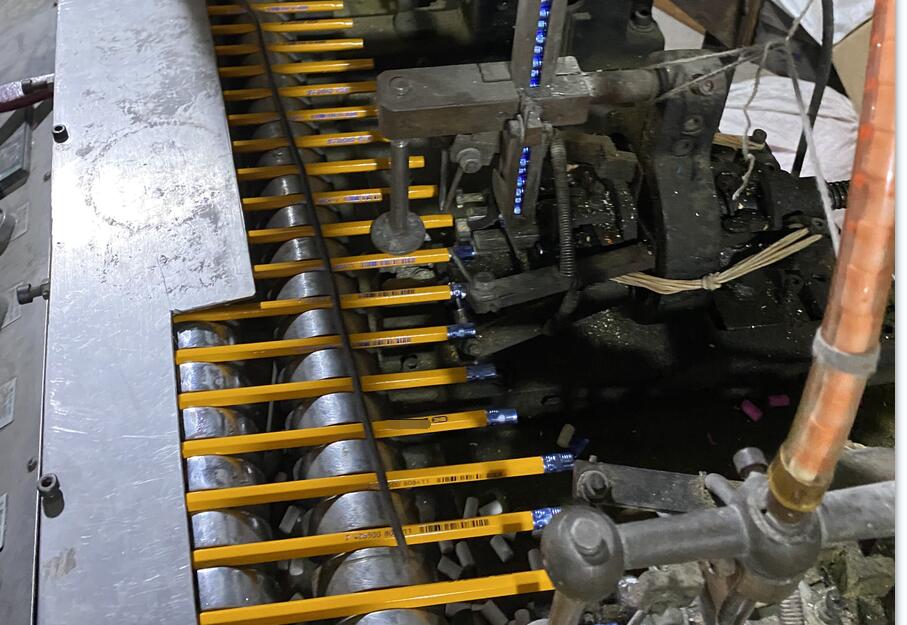
Step4.Cutting wood into individual pencils
An industrial table saw is used to cut wood and graphite chips into individual pencil shapes.
The saw cuts each panel into individual wood pencils. Sand them with sandpaper to give the exposed wood a smooth feel.
The saw cuts each panel into individual wood pencils. Sand them with sandpaper to give the exposed wood a smooth feel.
Step5. Take a Lacquer Shower
Dip the pencil into the lacquer bath repeatedly until the desired color is achieved.
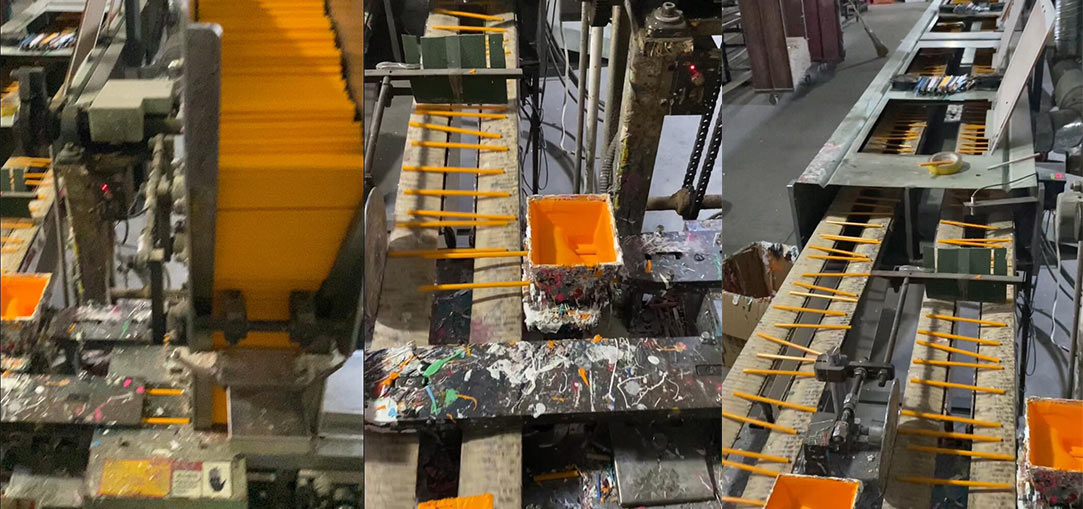
Step6. Finishing work
Add a final layer of varnish, metal cap and eraser. Any image or text can be printed on the pencil’s barrel if desired. The most common methods of adding personalized logos to pencils are screen printing or engraving.
Customers request that certain pencils have customized features, such as logos, images, or even messages on the barrel of the pencil.
The final step in finishing a pencil is a metal cap called a ferrule. The ferrule provides a location at the tip of the finished product to attach the eraser.
Customers request that certain pencils have customized features, such as logos, images, or even messages on the barrel of the pencil.
The final step in finishing a pencil is a metal cap called a ferrule. The ferrule provides a location at the tip of the finished product to attach the eraser.